Entering a catering order on the web portal
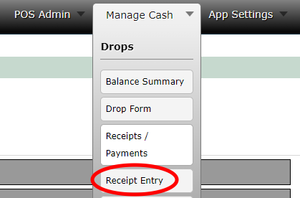
Open the Receipt Entry Web Page
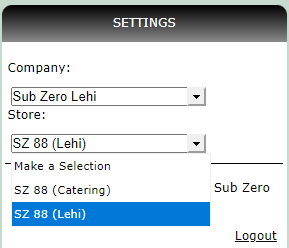
If you have a catering store set up, you will still most likely need to enter the receipt under the main store. Most of the time the catering store does not actually have menus or cashiers. The catering menu or menu section is usually set up under the main store.
Enter the Receipt Information
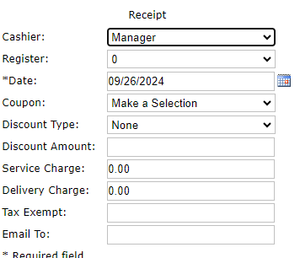
On the Receipt Entry Page, enter the receipt information such as the cashier, register number and date (the default date is the current date). If you wish to have the receipt emailed to someone you can enter the email address in the “Email To” field.
Add Receipt Entries
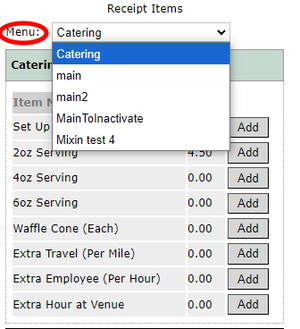
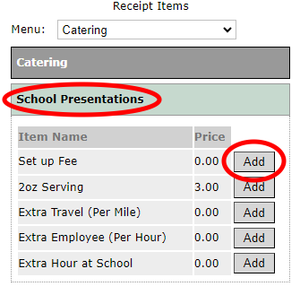
If you have a catering menu, select it from the Menu list. If you use a catering menu section, select your main menu used in the store.
Click on the menu section you wish to add items for and it will expand to show the list of the items in that section. You can then click the “Add” button next to the item you wish to add to the receipt.
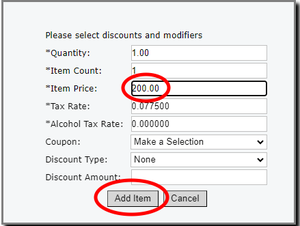
Clicking the “Add” button will allow you to enter the information for the item, such as the quantity, item price, tax rate and any discounts. When the information is correct, click the “Add Item” button to add the item to the receipt. This can be repeated for all of the items needed for the receipt.
If you make a mistake while adding items you can click the “Delete” button in the receipt items list to remove the item from the receipt. Then you can add the item again.
If the receipt’s total tax needs to be adjusted, you can change the calculated amount in the totals section
Add Receipt Payments
To add a payment to the receipt, select a payment type, then enter an amount, tip and payment date (the default date is the current date), then click the “Add” button to add the payment. Do NOT click the “Save” button before clicking the “Add” button or the payment will NOT be saved with the receipt. You can enter as many payments as needed. If you made a mistake while entering a payment you can click the “Delete” button and enter it again.
Save the Receipt
When all items and payments have been added, click the “Save” button at the bottom to save the receipt.
Then verify that the user feedback at the top of the page says “Receipt Saved.” If it does not, either correct any errors indicated or contact LinkPOS Support for help.
If the receipt was correctly entered under the catering store menu or menu section, it should now show up in the reports under the catering store instead of the main store.
