Bump screen options
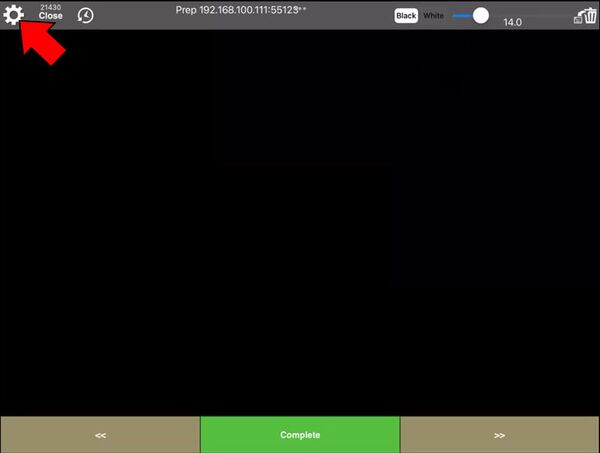
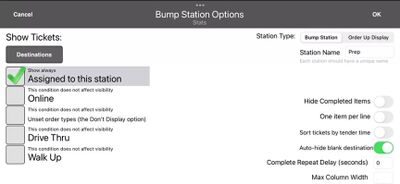
On the main bump screen select the settings button in the upper left corner of the screen to bring up the settings page.
Filters
You can filter what orders are shown on the bump screen.
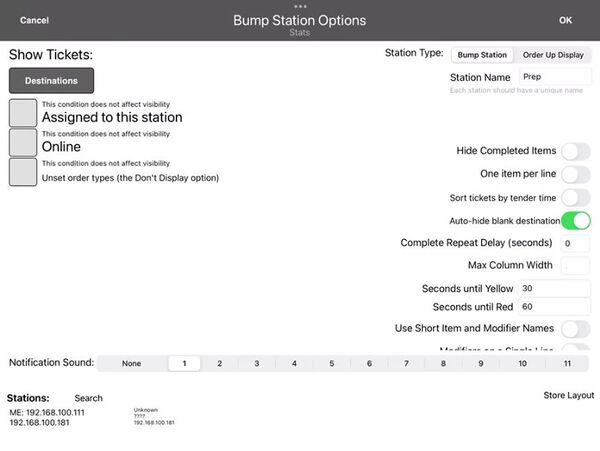
In the above example there are three filters - Assigned to this station, Online, and Unset order types
With no filters selected all orders will show up on the bump screen. This is the default.
Each filter can be unchecked or set to one of the following three options:
- Show always
- With this checked if the order matches the filter it will be shown on the bump screen.
- Show if this AND other conditions are true
- With this option selected the order will only be shown if this filter is matched and the other filters are matched also. This means that both filters have to match in order to show the order.
- Never show
- Don't show the order if it matches this filter even if it matches another filter.
Destinations
Orders show up on the screen from left to right with the oldest orders on the left.
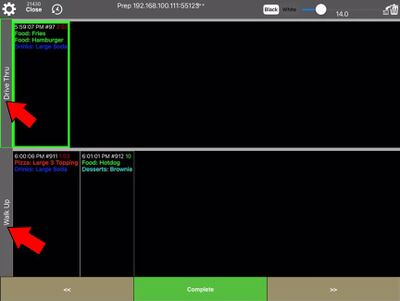
Destinations are represented by different rows on the bump screen.
Here is an example of how destinations can be used.
Let's say you have a Drive Thru register and a Walk Up register and you want to separate those orders so you can serve the drive through orders at the window and the walk up orders at the main counter. You could accomplish this by setting the destination setting on the walk up register to "Walk Up" and the destination setting on the drive through register to "Drive Thru".
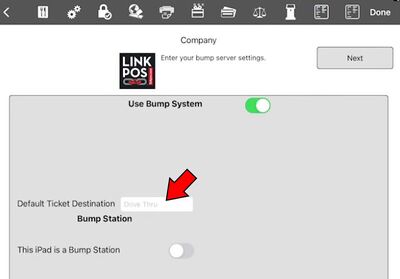
On the device login screen select the cogwheel in the lower right corner, enter the manager password, select the Settings button, and then select the second to the last tab. On the drive through device enter "Drive Thru" for the Default Ticket Destination. On the walk up register enter "Walk Up" in this same field.
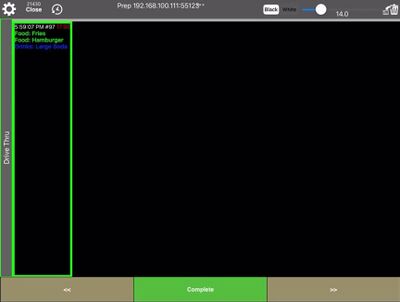
Then the bump screen will display a separate row for each destination. The name of the destination is in the left margin of each row:
Bump screen for a specific destination
Let's say you want to set up a bump screen that only shows the Drive Thru orders.
On the bump screen you would select the cogwheel in the upper left corner to bring up the settings page.
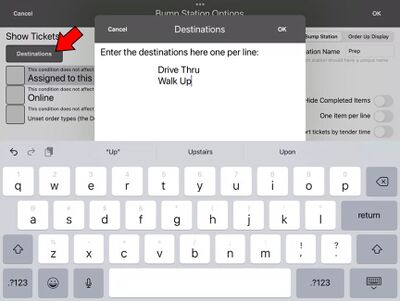
Then you would select the destinations button and enter the two destinations: Drive Thru, and Walk Up
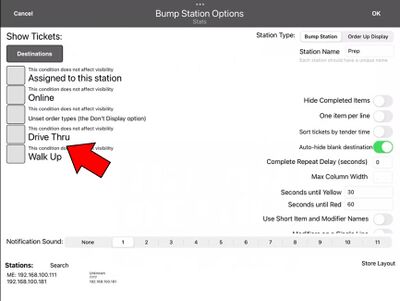
Now the destinations show up as filter options:
Now you can filter the orders so only the Drive Thru orders show up:
With Drive Thru set to always show and Walk Up to never show the bump station will only show the Drive Thru orders:
Bump screen for specific items
Lets say you have items on your menu that need to be prepared at specific bump stations and some items you don't want displayed on the bump station at all.
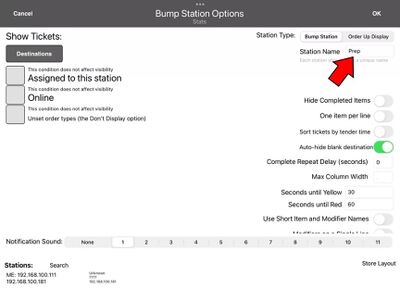
In order to do this you need to set the name of each bump station. In the bump station settings page set the name of the station.
In the above example the bump station is named Prep.
In another example you could have two bump stations, one called Hot and one called Cold. Items that need to be cooked like pizza, burgers and fries could go to the Hot station and other items like salads and drinks could go to the Cold station.
With the bump stations named you can log on the the web portal and select your menu to assign items to the bump stations.
Go to App Settings -> Menus -> [your menu] -> Bump Server Options
The Bump Server Options section allows you to assign items on the menu to bump stations.
In this case there are six bump stations in the sample store.
You can assign an entire section to one or more bump stations, or individual items to bump stations, or individual modifiers to bump stations.
With the menu updated to assign items to bump stations go back to the bump station devices and select the "Assigned to this station" filter so the bump stations only show the orders with items assigned to them
